

A solid TV install begins with a slow look at the wall. Drywall, brick, tile, studs, anchors, mount geometry and nearby power decide the job long before the screen is lifted.
Quick answer: the wall decides the mount before the bracket does
Treat the wall as the first piece of equipment. Drywall, studs, brick and tile each change the drill bit, fastener choice and risk level.
Service map: Pre-drill order: wall type, stud or anchor plan, mount fit, viewing height, cable route and final lift.
The checklist below is the way a careful technician slows the job down for a few minutes so the rest of the install moves without drama. It is not about making the job complicated. It is about finding the facts that matter while the wall is still intact: what is behind the paint, where the load can safely land, how the TV will connect, and what the room should look like when the technician leaves.
Safety boundary: This article explains planning and field checks for TV mounting. It does not replace local code, manufacturer instructions or a qualified electrician. TV power cords should not be hidden inside a wall unless an approved in-wall power kit or properly installed receptacle is used.
Start with the wall material, not the TV size
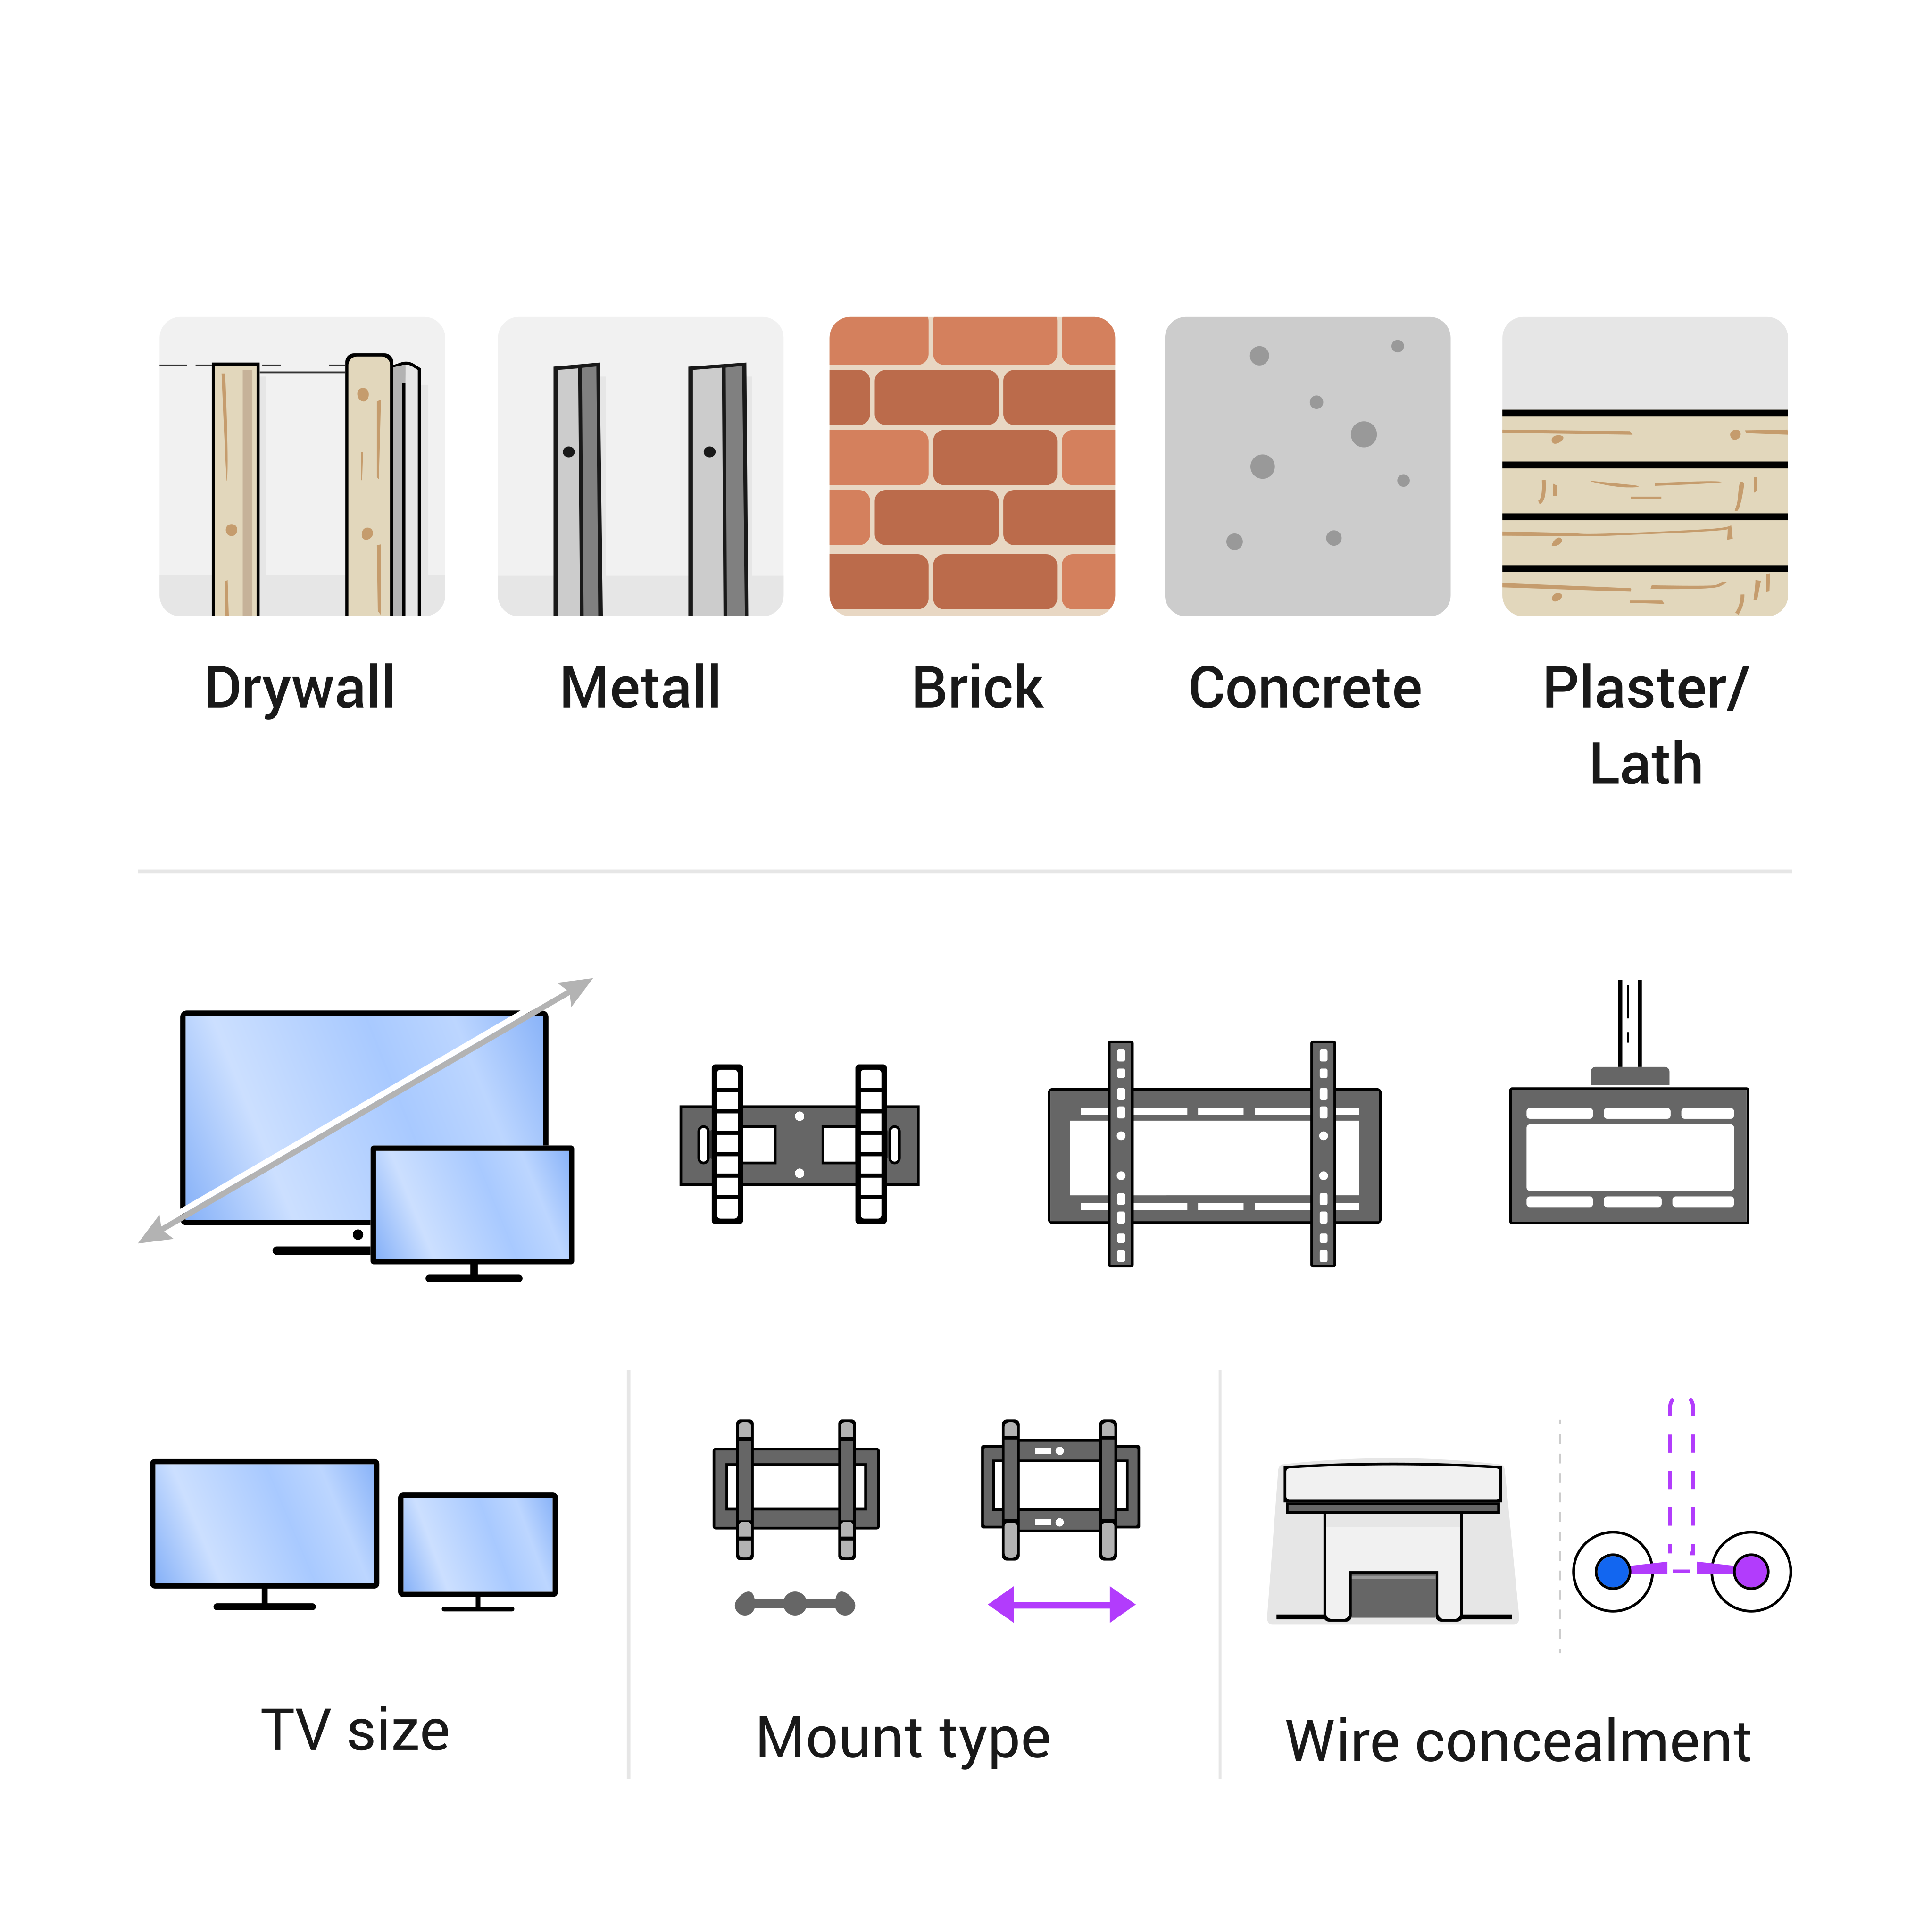
Homeowners tend to start with the screen: 55 inch, 65 inch, 75 inch, maybe larger. A technician starts with the wall. Drywall over wood studs is a different job from metal studs, brick, concrete, plaster, tile or stone. The same TV can be simple on one wall and a poor candidate on another wall in the same house.
Drywall by itself is not the structure. It is the surface. The mount needs a load path into studs, blocking, masonry or another rated support method. That is why the stud finder is only the beginning. A stud finder can be confused by pipes, dense plaster, foil insulation, tile backing, metal corner bead or old repairs. A technician uses it as a clue, then verifies the center line, spacing and wall behavior before committing.
Wall material checks before drilling
- Drywall with wood studs: locate the stud center, confirm spacing and avoid fastening too close to the stud edge.
- Metal studs: do not treat them like wood studs; full-motion mounts and large TVs often need a different anchor strategy or backing.
- Brick or concrete: use the correct masonry bit and anchor type, and inspect whether the material is solid enough for the load.
- Tile or stone: protect the finish, drill with the right bit, and confirm what structure is behind the finished surface.
- Plaster or older walls: expect inconsistent thickness, lath, repairs and hidden obstructions.


Find the load path, then choose the fasteners
The mount attaches to enough correct points on the wall, not every point. It needs enough correct attachment points in the right place. On wood studs, that usually means centering lag screws into studs and using the bracket slots intelligently. On masonry, it means matching the anchor to the material. On metal studs or hollow walls, it means understanding whether a rated toggle-style solution is acceptable for that TV and mount type.
Full-motion arms deserve extra respect. A fixed mount keeps the screen close to the wall. A full-motion mount lets the TV move outward, and that turns the TV into a lever. The wall sees more stress when the screen is pulled out and turned. That is why a mount that seems fine on paper can still be a bad fit for a weak wall or uncertain stud layout.
Fastener and bracket checks
- Confirm the TV weight and compare it with the mount rating, not just the advertised screen-size range.
- Check the VESA pattern on the TV and make sure the bracket arms do not block ports or vents.
- Verify the mount type: fixed, tilting, full-motion, ceiling, corner or specialty mount.
- Use pilot holes where the mount instructions require them, and use the bit size specified by the hardware.
- Do not substitute random screws because they are close enough; length, diameter and head shape matter.
Measure viewing height before the holes make the decision for you
A TV mounted too high looks impressive for five minutes and becomes annoying every night after that. The practical target is the seating position, not a generic number. In many living rooms, the center of the screen lands near seated eye level or slightly above it. Fireplaces, beds, kitchen sightlines and open rooms can change that, but the change should be intentional.
The technician marks the screen outline or at least the bracket reference line before drilling. This catches common mistakes: the TV colliding with a shelf, the bottom edge sitting too close to a console, the screen covering an outlet, or the mount landing where the cable ports cannot be reached after installation.
Viewing and clearance checks
- Confirm the room position where people actually watch TV.
- Check glare from windows and lights before choosing the final height.
- Leave room for a soundbar, media console, streaming box or cable box if they are part of the setup.
- Confirm that full-motion movement will not hit a wall, cabinet, fireplace mantel or doorway.
- Make sure the TV ports remain reachable or that cables are plugged in before the final lift.
Plan power and low-voltage cables as separate problems
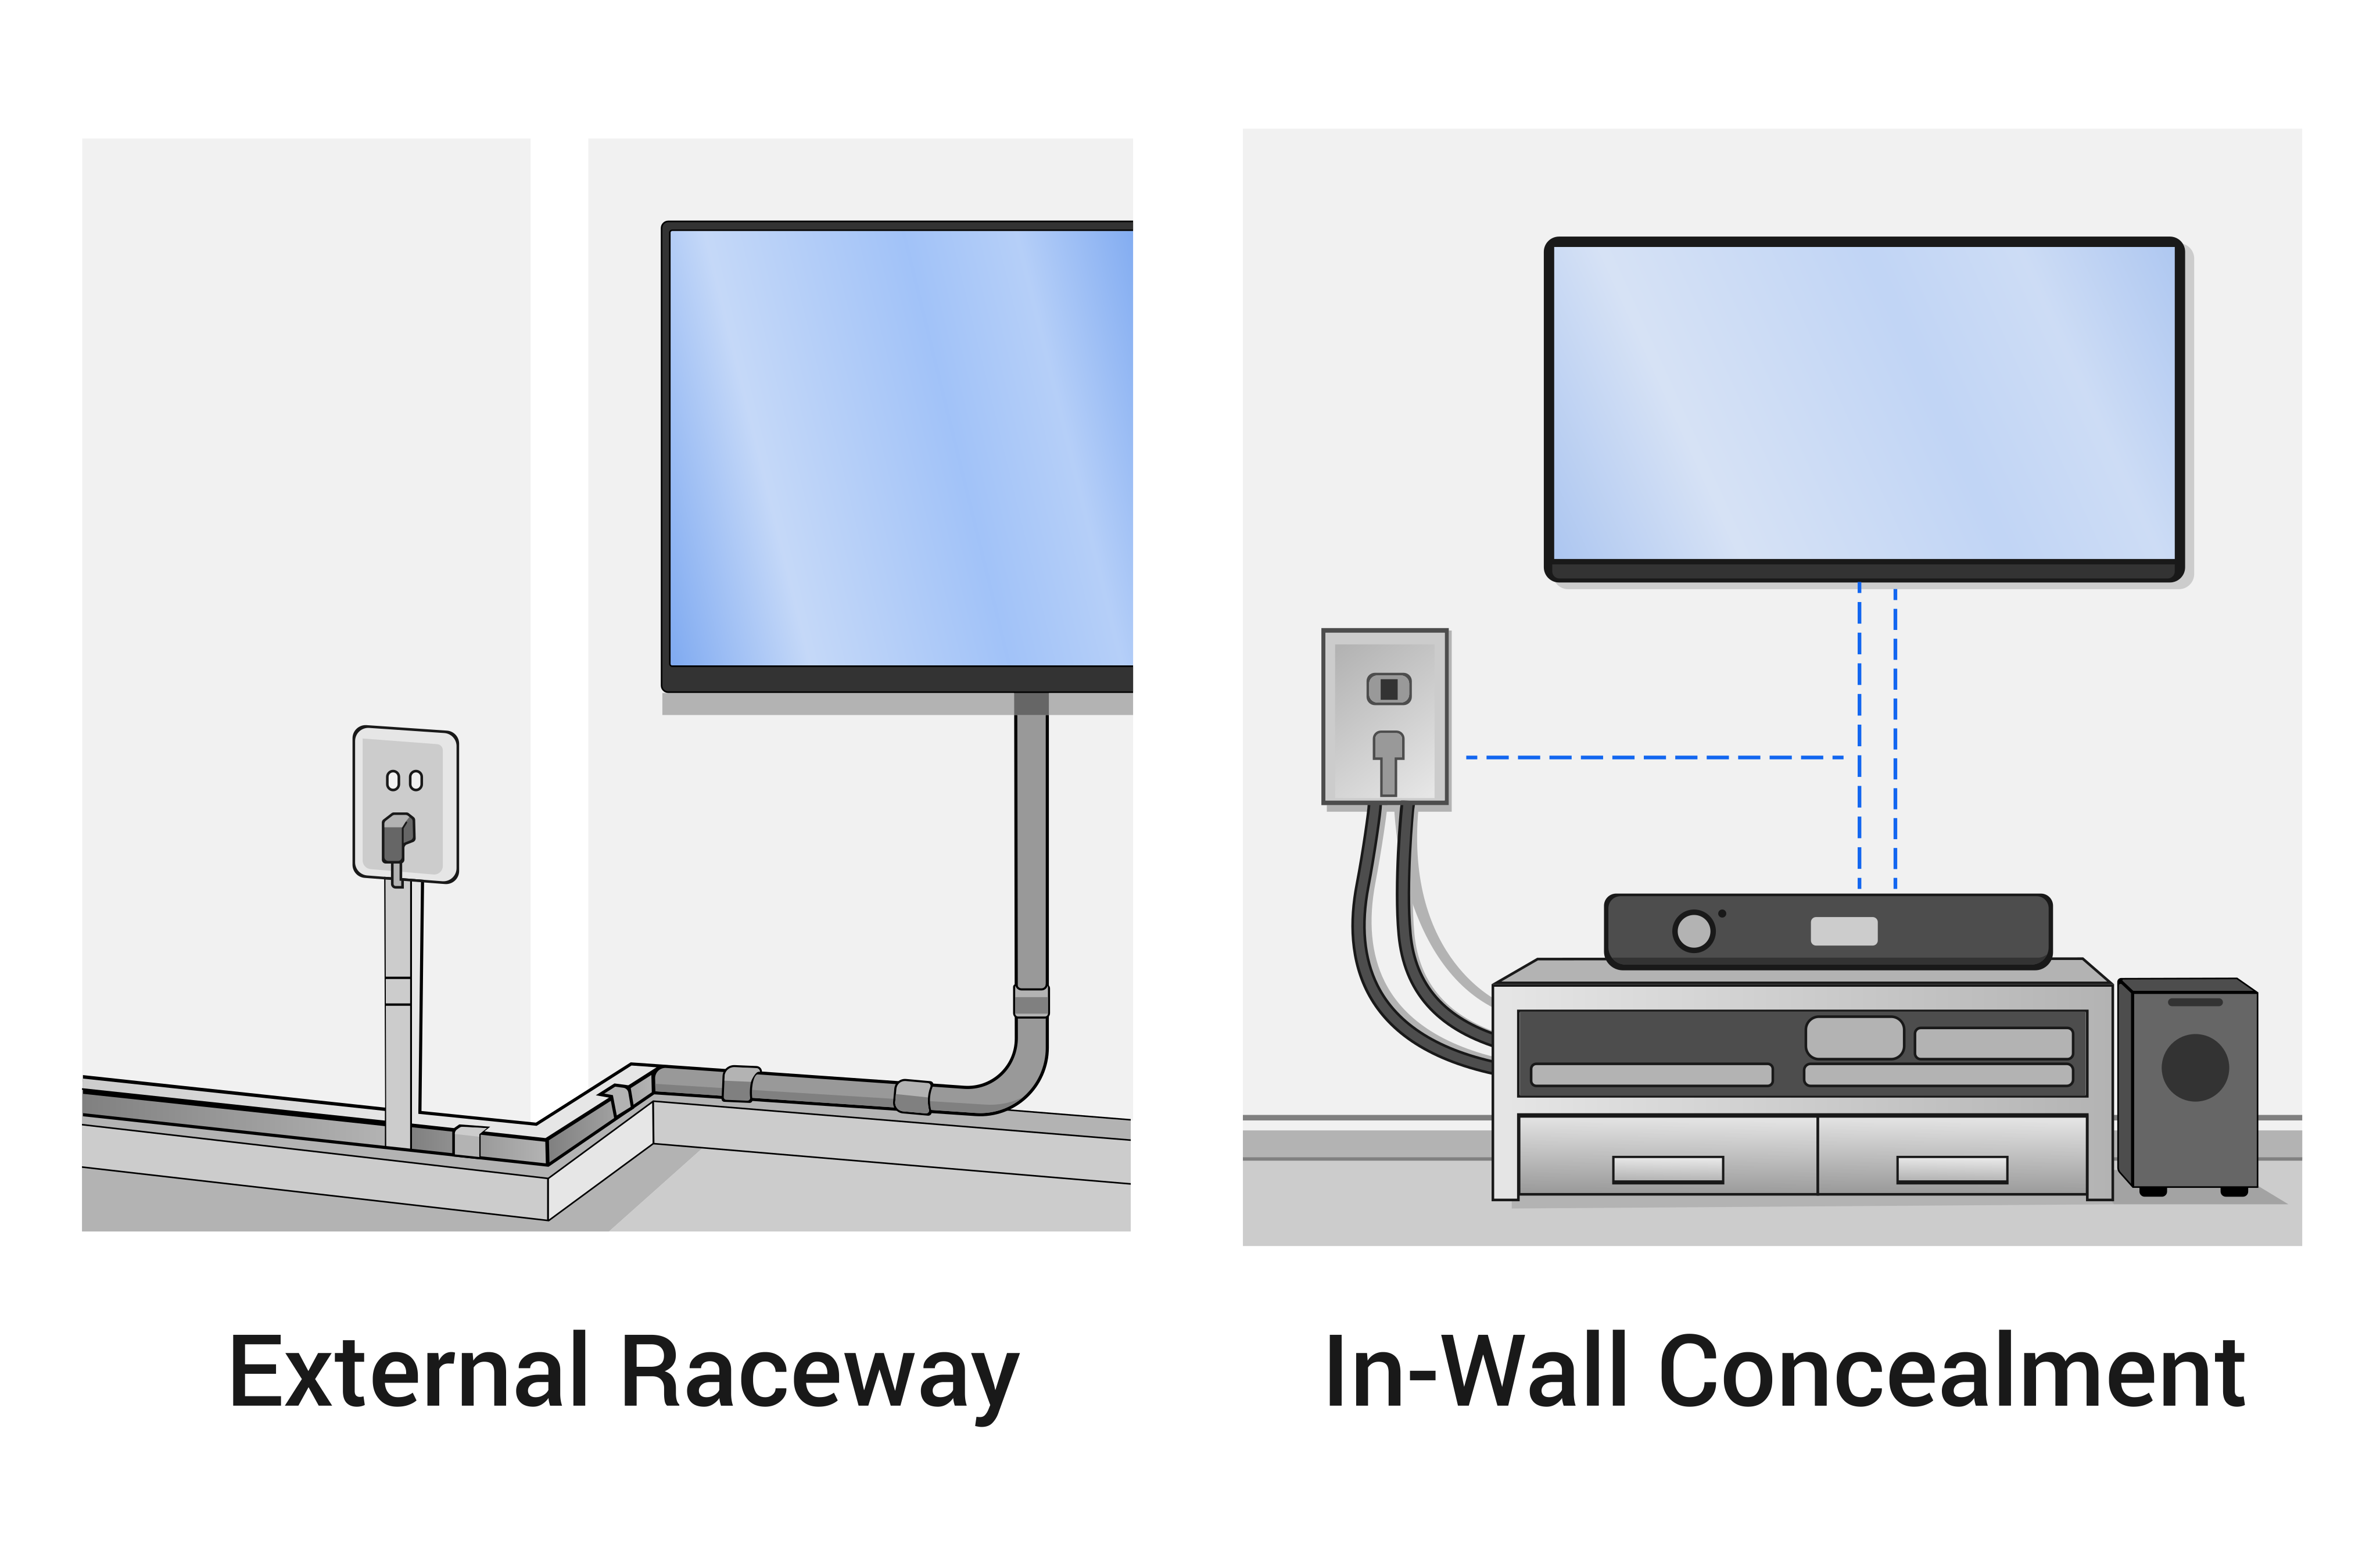
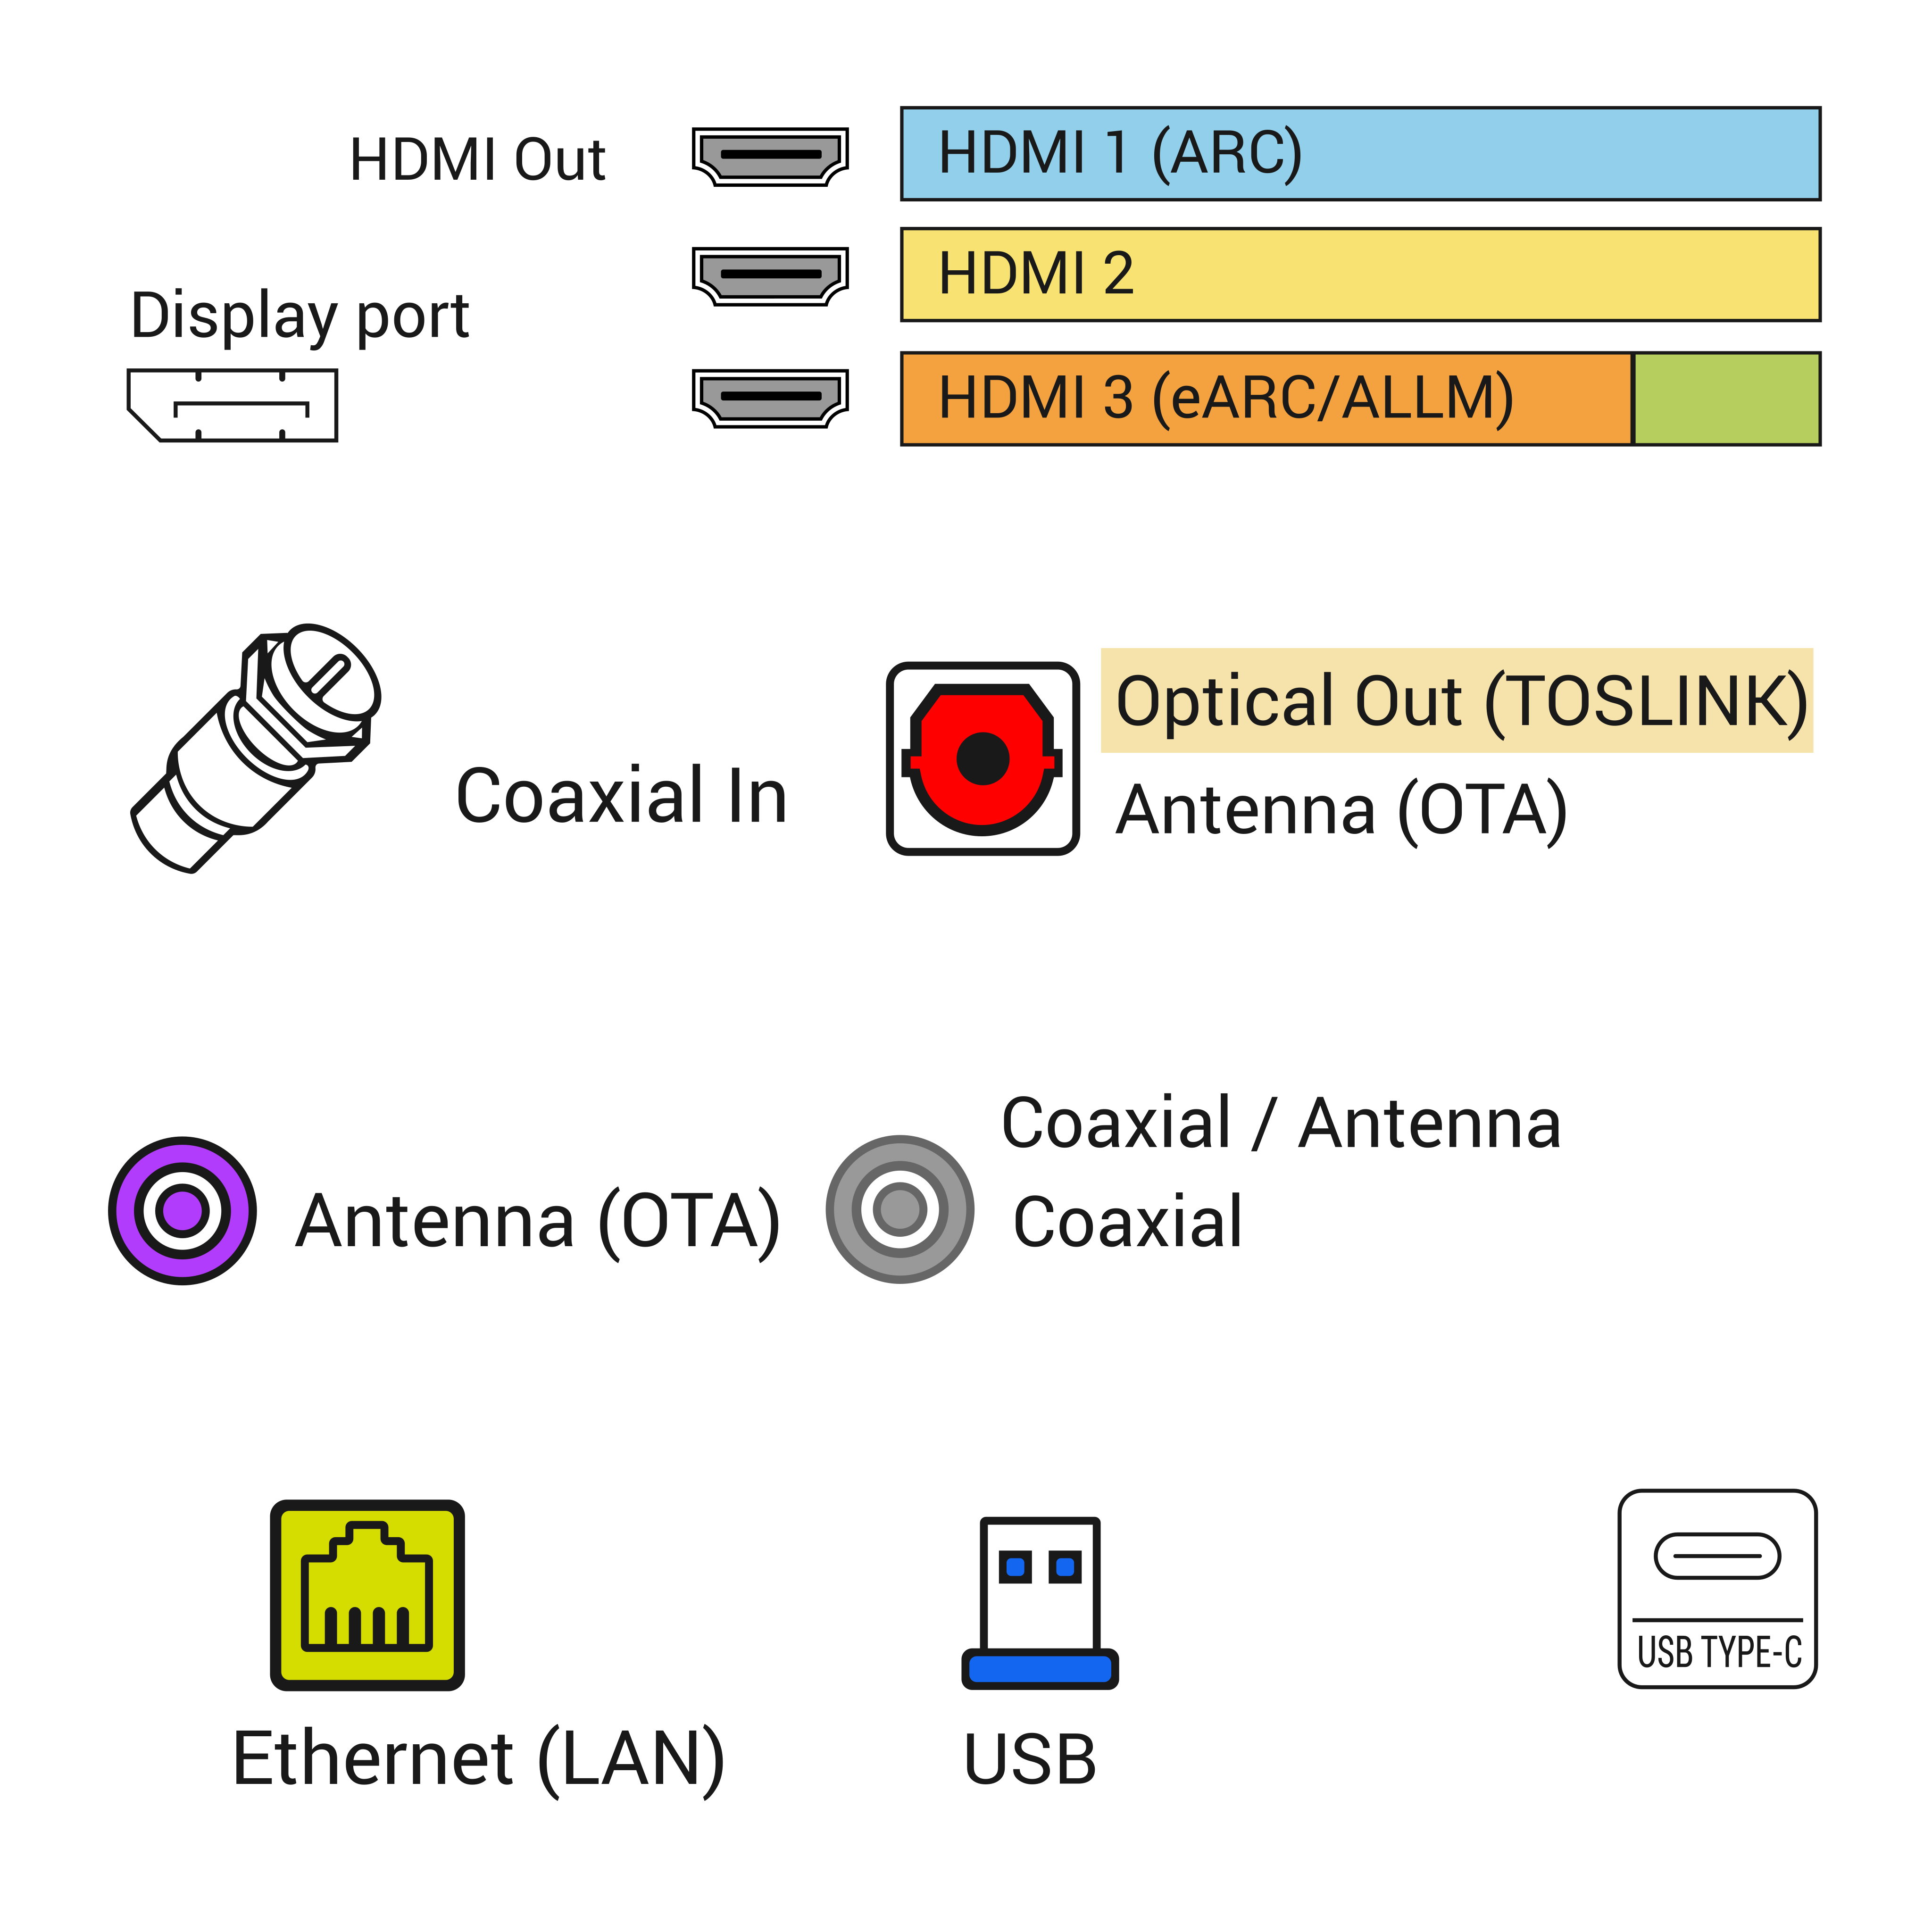
The cleanest-looking mount still has two different cable questions. Low-voltage signal cables include HDMI, Ethernet, coax and optical audio. Power is different. A TV power cord should not be buried inside the wall like an HDMI cable. If the customer wants the power hidden, the plan usually needs a proper receptacle behind the TV or an approved in-wall power relocation kit.
Cable planning also affects bracket placement. HDMI connectors need bend radius. A soundbar may need HDMI ARC or eARC, optical audio or power in a different location. A streaming device may need USB power or enough Wi-Fi signal behind the TV. The mounting checklist should catch those details before the TV is hanging flat against the wall with the wrong cable on the floor.
Do a dry fit before the final lift
A dry fit is where many small problems show up cheaply. The bracket arms may need a different washer stack. The TV may have recessed mounting holes. A cable may need a right-angle adapter. A soundbar bracket may share the same mounting area. A fixed mount may leave less hand clearance than expected. These are not failures; they are the reason the check happens before the screen is locked on the wall.
The TV is also handled like a finished surface. Large screens flex. Thin panels can be damaged by pressure in the wrong place. Two people should lift larger sets, and the lift should be planned so nobody is reaching over a console or twisting the panel while trying to hook the mount arms.
Drill only after the plan survives the checklist
Good drilling is boring because the decisions have already been made. The bracket line is level. The wall type is known. The fastener choice matches the mount and the surface. The cable path has a real exit. Power has a safe plan. The TV height has been marked against the room, not guessed from a product photo.
When something does not match the plan, the technician stops and explains it. That may mean moving the TV a few inches to hit structure, switching from in-wall concealment to raceway, changing the mount type, adding a backing plan, or recommending electrical work before the mount is finished. The worst outcome is not a slower job. The worst outcome is a fast job that hides a known risk.
What the closeout proves
The job is not finished when the TV is hanging. A good closeout proves that the installation works as a system. The screen is level. The mount hardware is seated. The TV powers on. The right input is selected. HDMI, streaming, cable box, antenna, soundbar, Wi-Fi or Ethernet are checked if they are part of the job. The customer can use the setup without guessing which loose cable goes where.
A technician also leaves the room serviceable. That means the customer knows where the cables go, which limitations remain, and what not to pull or force later. If there is no in-wall power plan, say that clearly. If the wall material limited the mount location, document it. The closeout is part of the install because it prevents the next avoidable service call.
Pre-drill checklist summary
- Identify the wall material and structure before choosing anchors.
- Confirm TV weight, VESA pattern and mount rating.
- Treat full-motion mounts as higher extension load than fixed mounts.
- Mark screen height, bracket position, clearance and viewing angle before drilling.
- Separate low-voltage cable routing from power safety.
- Dry fit cables, bracket arms and port access before the final lift.
- Test the finished system, not just the wall bracket.
Before booking: Before booking, send a wide wall photo, a closer outlet or console photo, TV size, mount status and whether cable concealment is part of the job.
Send wall evidence before the drill comes out
A booking photo packet beats a vague screen-size request. The first review looks for structure, surface, outlet position, viewing height and cable reach.
Wall-mount decision table
| Site clue | Check next | Photo or note to send |
|---|---|---|
| Drywall with unknown studs | Stud spacing, blocking and outlet location | Wide wall photo plus a close photo of the outlet area |
| Brick, tile or stone | Drill surface, anchor type and finish risk | Angled photo showing material and nearby edges |
| Large or full-motion mount | Load path and arm extension | TV model, mount model and planned viewing position |
Use the row that matches the wall, then collect only the proof that helps the installer plan the first hole.
Quick FAQ before drilling
Short answers for the questions that usually decide whether the mount is ready or needs a site check.
Can every wall hold a TV mount?
No. Stud layout, masonry condition, tile, fireplace heat, old plaster and mount rating all matter before drilling.
What should be checked before choosing the height?
Seat height, screen size, glare, outlet position, furniture depth and whether the mount tilts or extends should be checked together.
When should the plan pause?
Pause when the wall material is unknown, the mount hardware is incomplete, the TV is too heavy for the bracket, or power would be hidden unsafely.
Safe pre-visit packet
- Wide photo of the whole wall and floor area.
- Close photo of outlets, low-voltage plates and existing cables.
- TV size/model and mount model if already purchased.
- Viewing position, furniture height and soundbar or console plan.
- Private labels, receipts and account screens left out of public examples.
Closeout evidence starts before drilling: a wide wall photo, a bracket reference mark, a cable route note and one final test photo give the next service person a clear record.
The proof is plain: wall material, fastener path, outlet position, TV model, mount model, final input test and any exception the installer found.
If the plan changes onsite, the note names the reason: stud location, masonry surface, blocked cable path, power boundary or furniture collision.
That record protects the room after the visit because the customer knows which cable path, bracket limit and service access point remain available.
Wall-mount prep sheet
Send the wall photos before mount day
A clear front wall photo, side angle, outlet view, mount box, TV label and seating distance help catch height, bracket and wall-material problems before the drill comes out.
Trusted safety references
These references support the safety side of TV placement, anchoring and ladder setup. They do not replace manufacturer instructions or local code.
Share this article:
Facebook X LinkedIn Email Text Add comment
Need help with a similar setup?
Send photos of the wall, network equipment, device labels you can share safely, and the result you want. The service team can usually narrow the right next step before an onsite visit.
Plan a cleaner service visit
Send a wide photo, one close device photo, the cable path and the result you want. Leave out account screens, addresses and private labels unless they are safely covered.
Request a callFeatured service

Field Service Blog Guide: TV, Wi-Fi, POS, Security and Onsite Support
Use this guide as a dispatch map for the real problem in front of you: screen, cable, Wi-Fi, POS lane, rack, camera, phone or onsite support visit.
View servicesRelated articles
Comments
Reader notes and service questions
No approved comments yet.
Leave a comment